A Much Needed Dresser Update
HELLO beautiful people!! Happy Sunday!
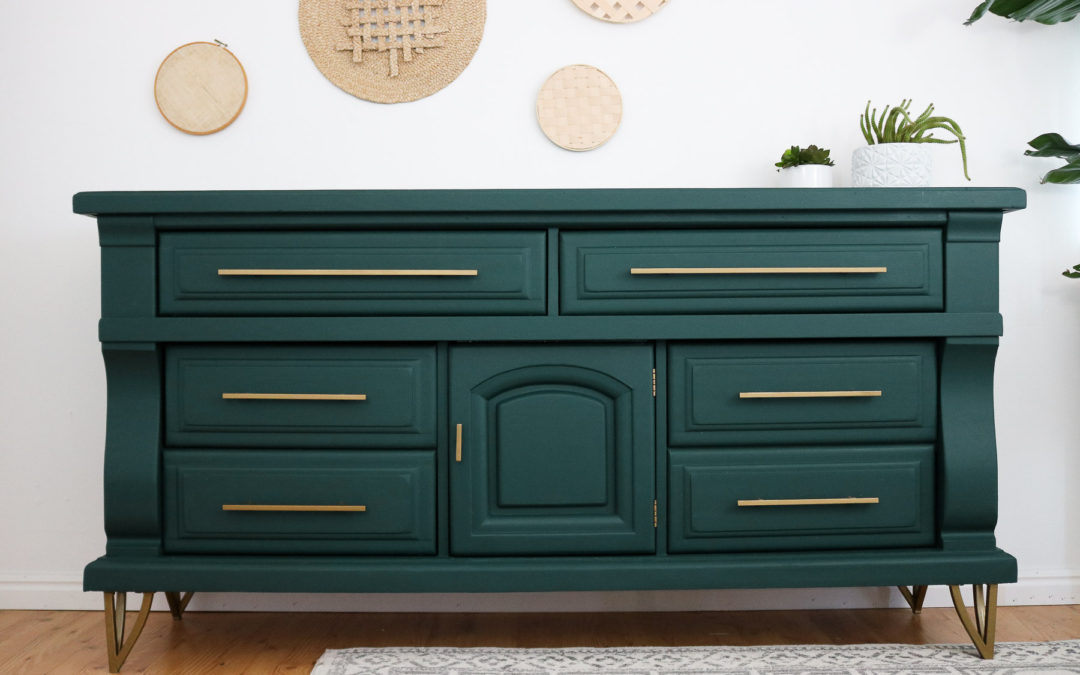
Today’s topic is my green dresser!
I was so scared and excited to give this dresser a makeover! Scared??! Because I never cut the bottom of a dresser off before… I questioned this idea for a while and finally decided if I really want the look I’m going for the curvy details had to go! I purchased this dresser about 4 years ago for $25 at a garage sale! It’s solid wood and probably the best deal I ever got on any piece of furniture. The lady that was selling it said it was her grandma’s old dresser and I was totally shocked when she said yes to my offer. They always say ” it never hurts to ask!” I’m so glad I did.
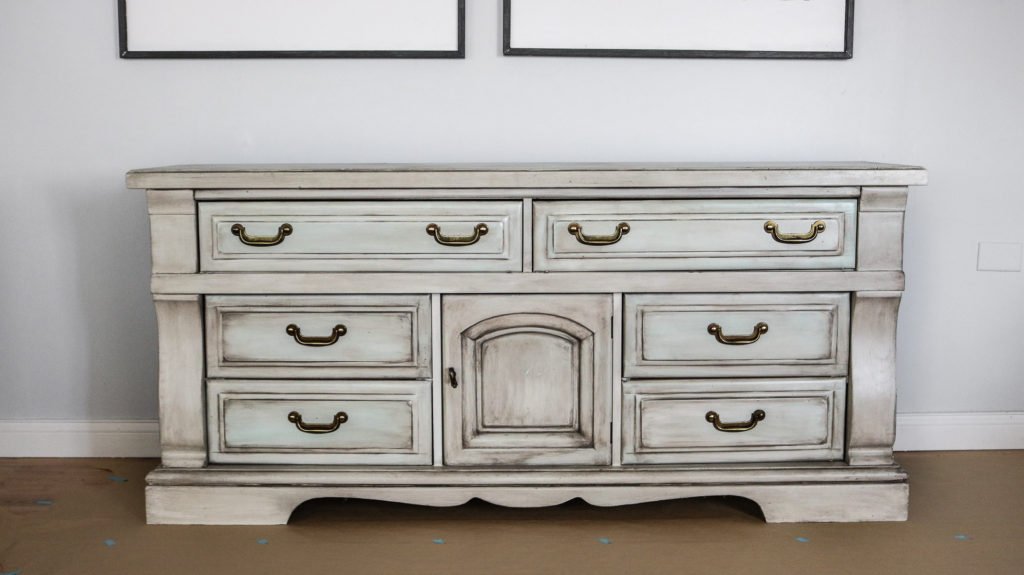
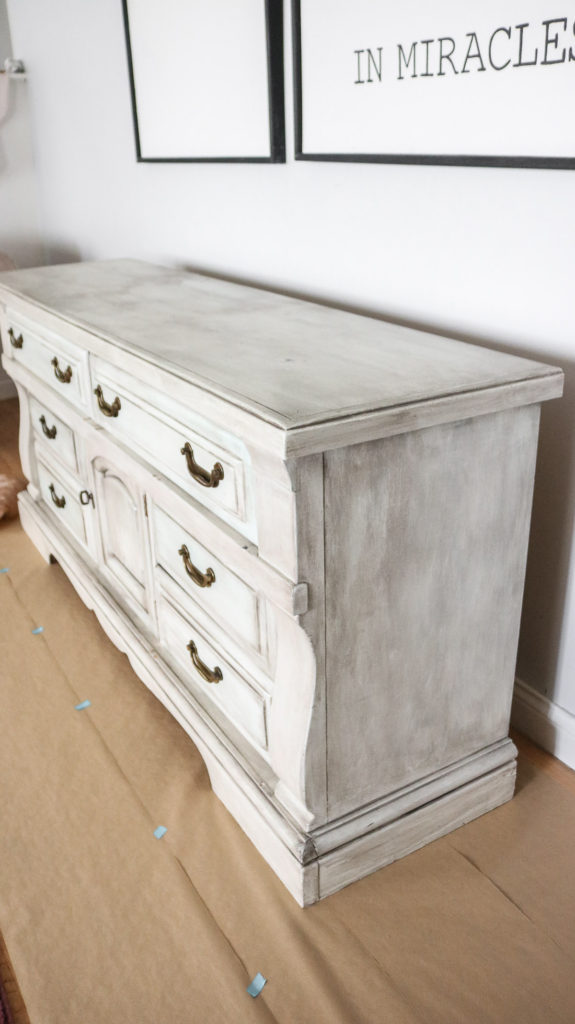
Originally when I got it it was stained wood and pretty beat up. I didn’t feel like stripping it and re-staining it because I wasn’t into wood back then so I decided to paint it off white and antique it (photo below) I was ssso in LOVE with it at first and honestly it totally matched my house because, I was obsessed with shabby chic. Since I started this blog I’ve slowly found that I love a cleaner modern look. Now I look back at this dresser and wonder what was I thinking when I painted it??! 🙈😬 It’s not the worst but, the dirty look isn’t something I’m drawn to anymore.
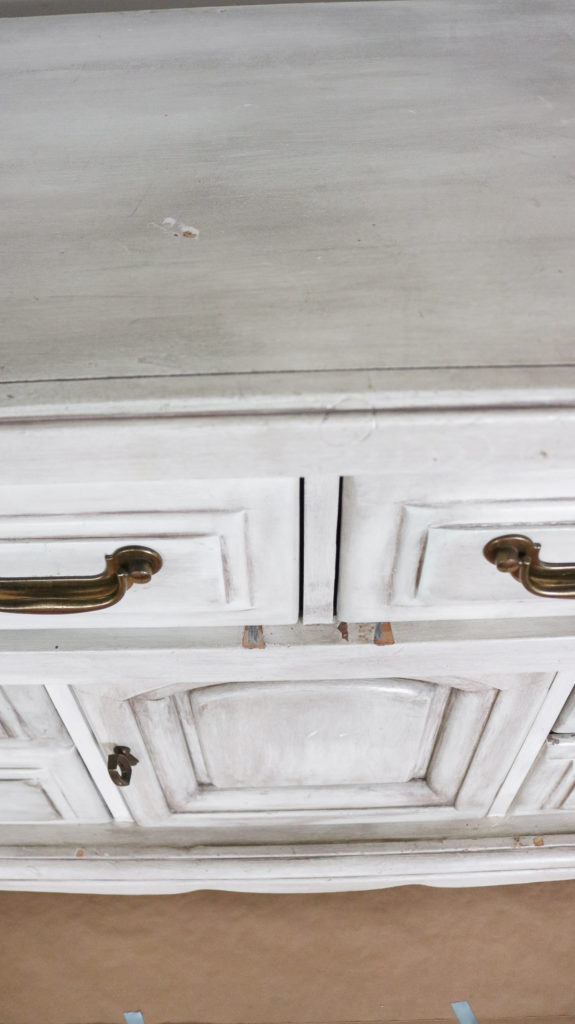
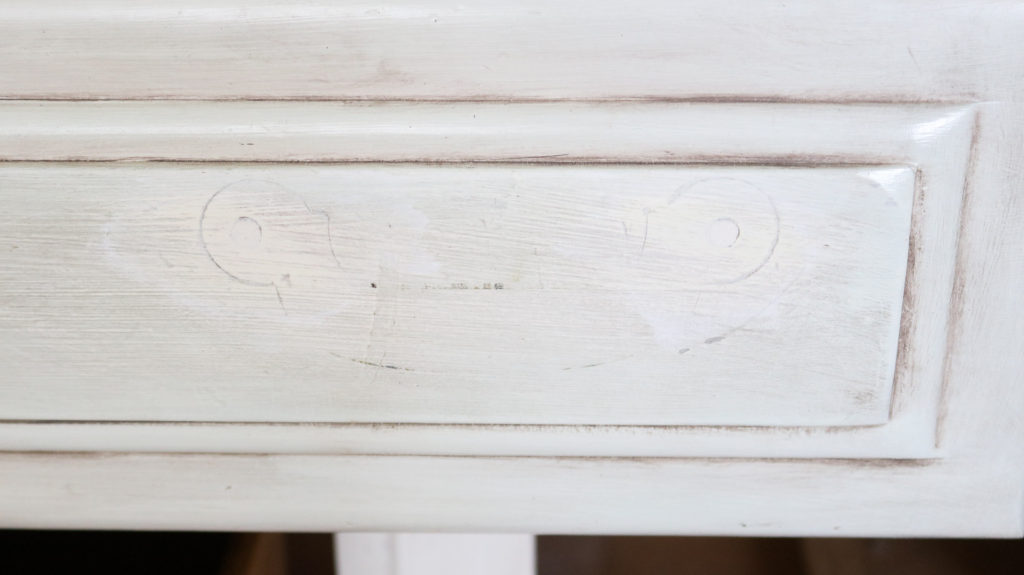
As you can see the paint has wore off quite a bit and I feel like overtime the antique glaze worsened and turned blotchy. LOL😂 or maybe my eyes finally opened to what it really looked like the whole time 😂🙈! Do you ever feel like you put so much time into a project and you LOVE IT just because you put so much work into it! Then overtime you forget how much time was put into it and you get over the look! 😬😬 This dresser would probably fall into that category.
DIY CHALK PAINT IN THREE MINUTES
Before we jump into this dresser update I want to mention this isn’t going to be a step by step tutorial like I usually do. The reason for that is because there’s all kinds of different dressers out there and some of the things we did to this dresser might not need to be done to your dresser. I do hope this inspires you to update some of your old furniture instead of donating it! With that said, I won’t totally disappoint with no DIY I will be showing you how to make your own chalk paint in under 3 minutes. Using almost any interior paint. AWESOME!! RIGHT! It’s easy I promise!
CAUTION ! WHICH PRODUCTS TO AVOID!!!
I’m not going to lie this dresser wasn’t any easy project. I ended up with a total of 4 coats of paint + some matte finishes that were a total flop. I will be sharing what products to avoid and why! So stay tuned for that!
Prepping the dresser for paint!
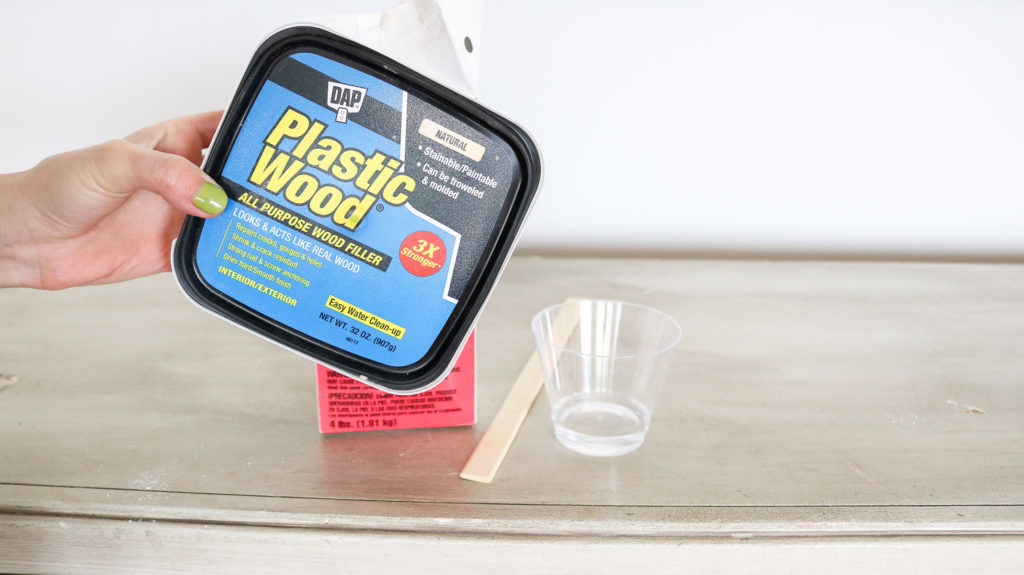
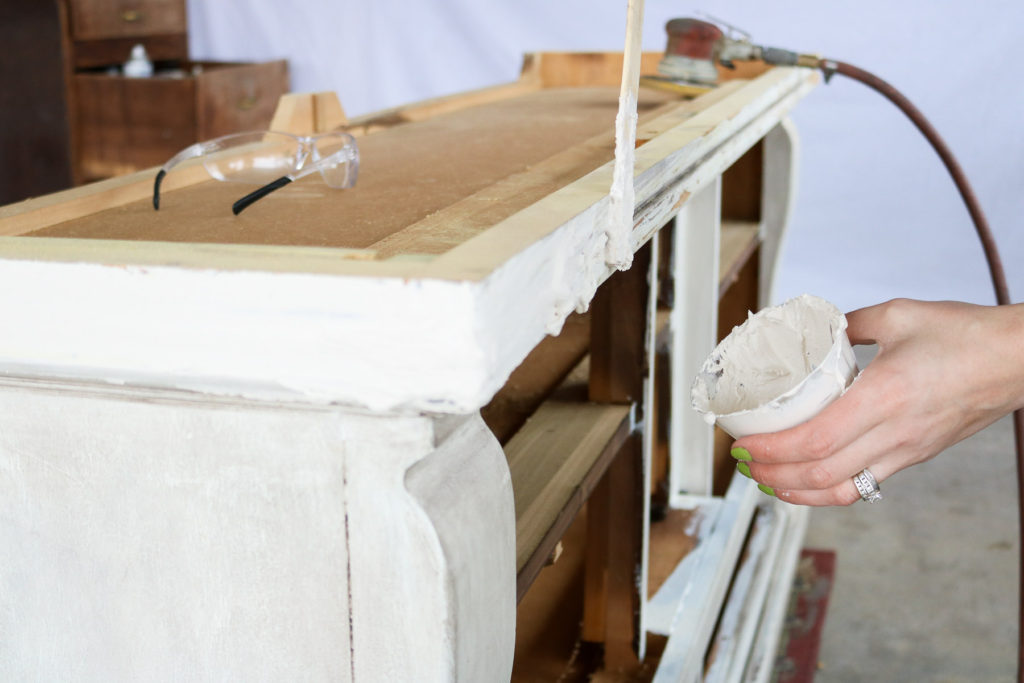
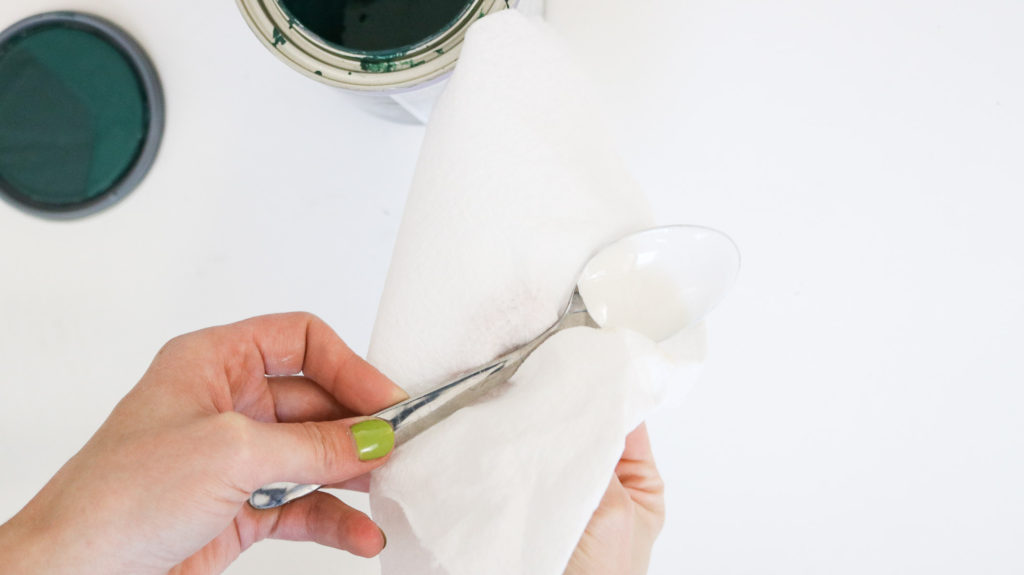
To begin I removed the handles and covered the holes with plaster. Since we planned on making new handles for a more modern look I knew the previous holes from the old hardware wouldn’t line up. If you’re wondering why I used plaster and not wood putty it’s because I’ve had some pretty bad experience with it. I swear that wood putty stuff never really sets. I have some on a spatula from three weeks ago and it still comes off super easy with my finger nails. If you’re wondering how durable plaster is? Just to give you an example.., if you leave it on a metal spoon and it sets (takes about an hour) you will not be able to remove it at all unless you sand it down. It’s super duper strong and sticks to anything. Thus said I would avoid washing any of this plaster powder or mixed plaster down your sink drain or any drain in your house. That’s why I always use disposable containers or wipe everything down with a paper towel before it sets.
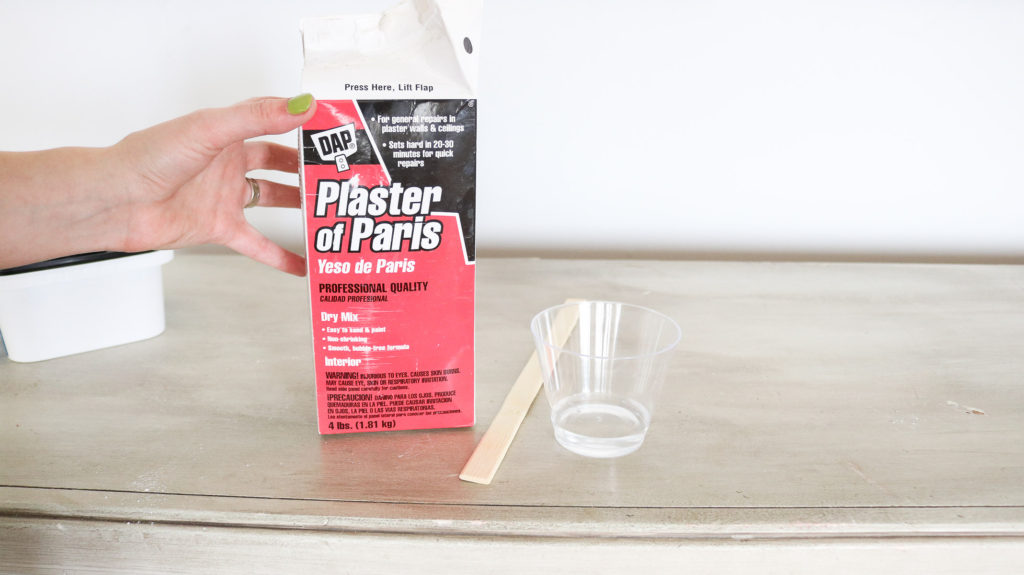
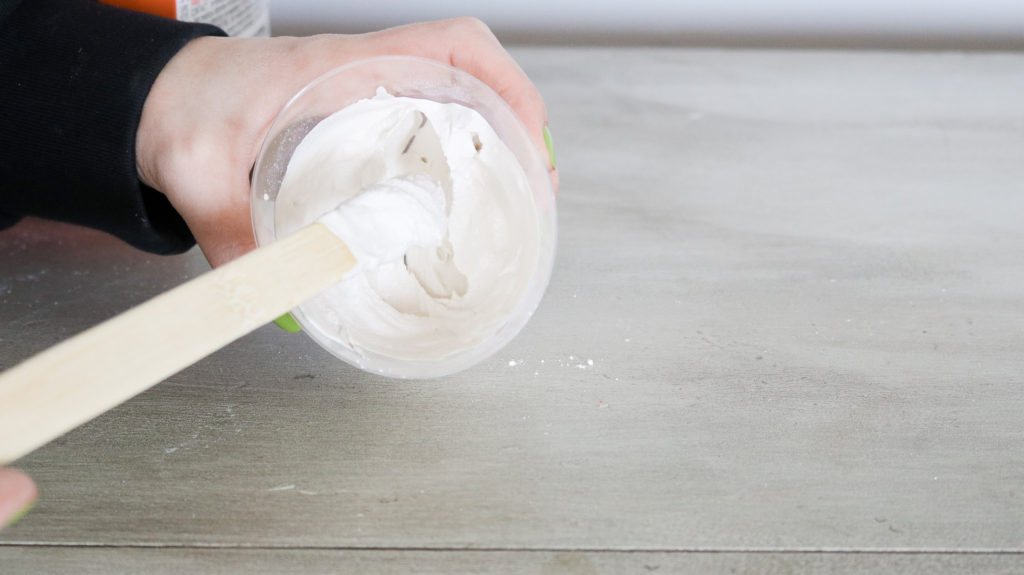
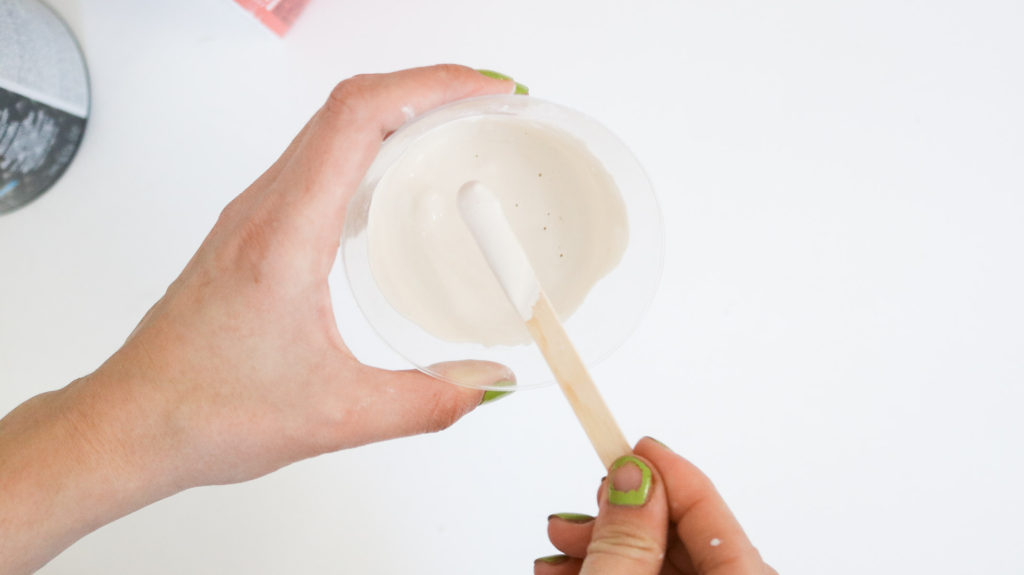
To make your plaster paste you’ll need about 1/4 cup of COLD water. Then keep adding your plaster powder until it’s pretty thick and stir until it’s smooth. Once you have a thick paste cover your holes and let it set. Plaster sets pretty quick. You’ll have about a 7 minute work time and then it’ll start setting pretty quick. After about two hours you should be able to sand it down.
Here’s the wood putty I haven’t had a great experience with. It doesn’t seem to set at all!
Here’s how thick your plaster paste should be to cover holes.CUTTING OFF THE BOTTOM!
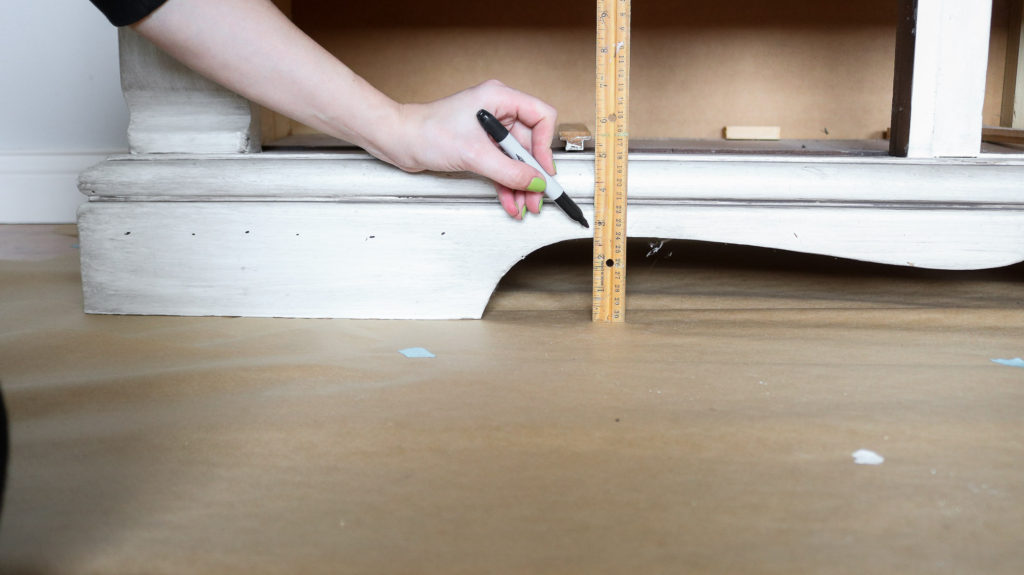
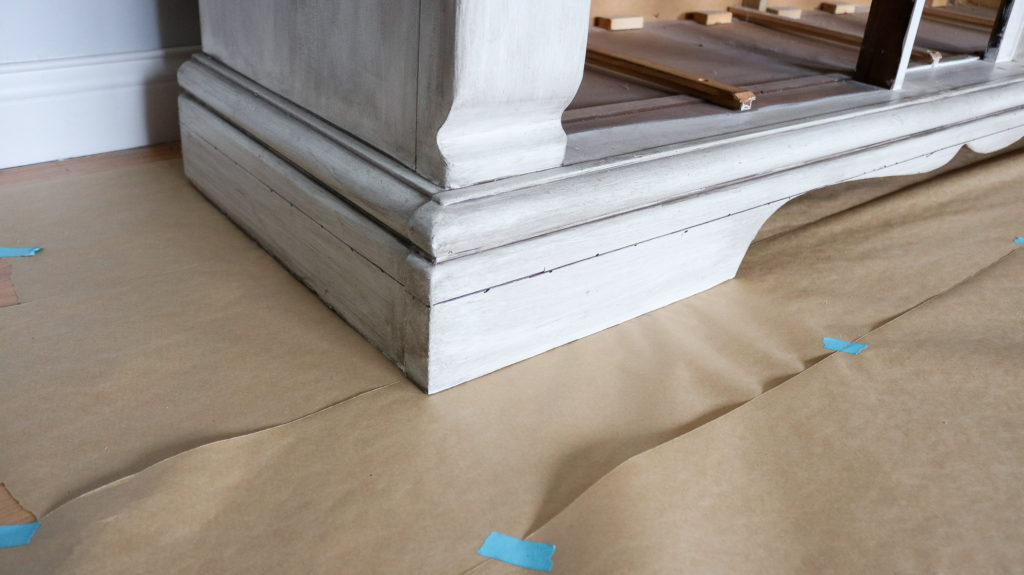
Because I wanted to add legs to this dresser we needed to cut the bottom curvy wood off. One of the biggest things I struggled with when it came to this dresser is keeping it clean under. Because it wasn’t flush with the ground spiders got under it and made spider nests all the time. It was also almost impossible to keep up with the dust because, I wasn’t able get under it to sweep and would have to move it all the time which was kind of pointless because, I would drag all the dirt with it anyways! To prep it for cutting I measured the highest curve point which was about 3 inches from the floor and marked the same distance from the floor all around the dresser.
Then we took it outside and Tony cut it all off with the circular saw. I was totally cringing at this point! This was our first time trying this!
Hiding wood grooves!
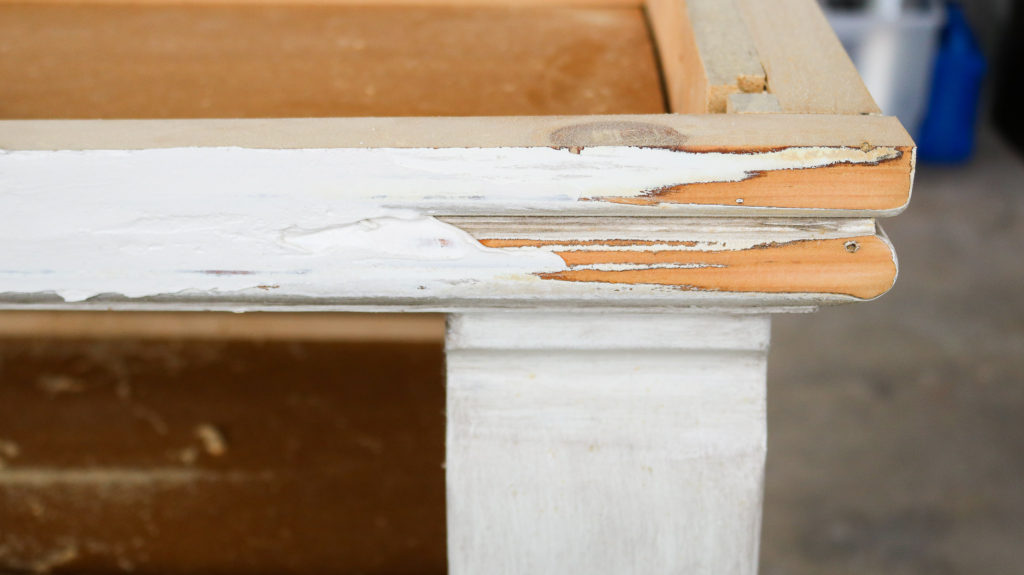
I also decided to fill in the wood groove at the bottom since I wanted the top and bottom of the dresser to match. ( photo below is showing the dress upside down) The top of the dresser originally didn’t have a groove! Plastering it sounds iffy?!! But, that’s how much I trust this plaster stuff. I’ll let you know how it holds up.
Here’s a close up on the groove right before I plastered it. I also sanded the whole dresser down a bit before painting it.
PAINTING THE DRESSER!
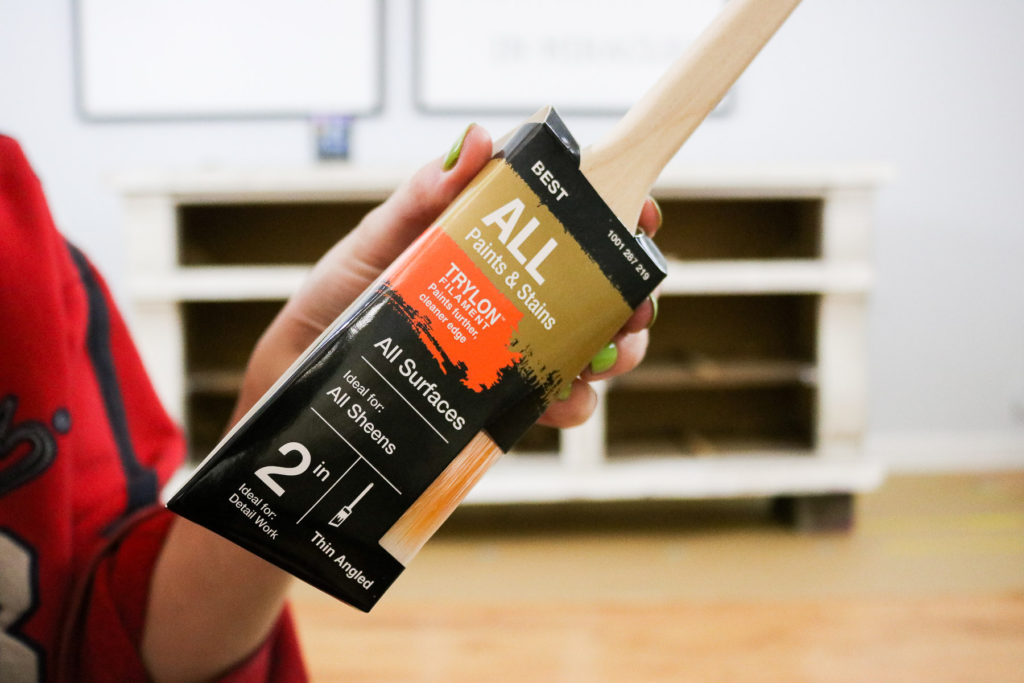
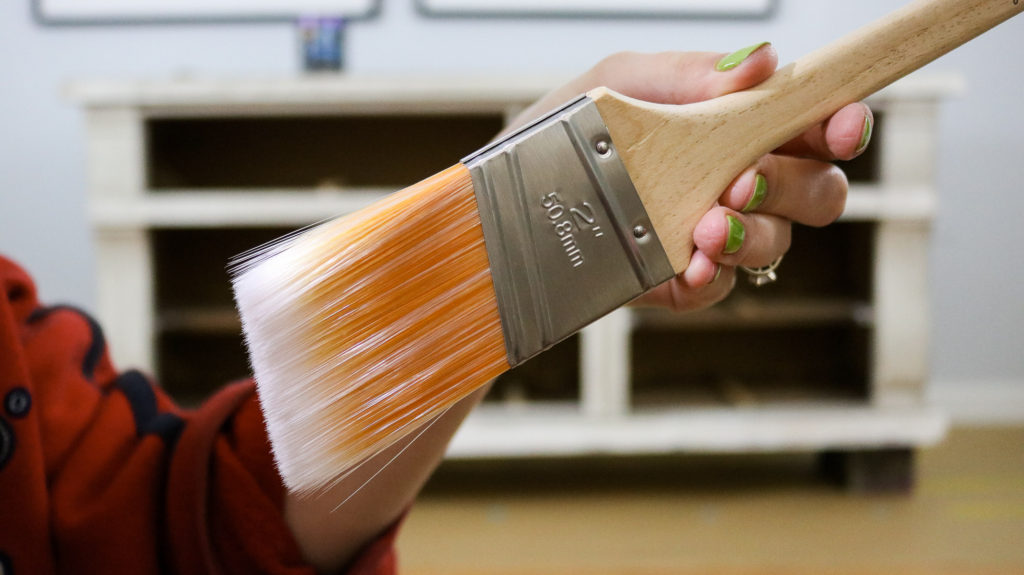
Here’s my new favorite paint brush. I used to be a huge fan of the purdy brush. This trylon brush wins it over because it applies the paint on just as smooth but, it’s way easier to clean. Somehow only about the first 1 1/2″ of the top of this brush gets paint on it when painting with it. The purdy brush would always let the paint seep into it way deep which make it hard to clean. (I bought mine trylon brush at homedepot)
DIY Chalk Paint in 3 minutes!
If you’re thinking chalk paint is hard to make than your in for a surprise. I’ve been making chalk paint like this for years. It only takes about three minutes and can be done with most interior paint. I avoid paints that have primer in them already. Even though they will work just as great as any other paint their shelf life is shorter. So they’ll be good for about 4 months after you turn it into chalk paint. Which is till not bad at all!
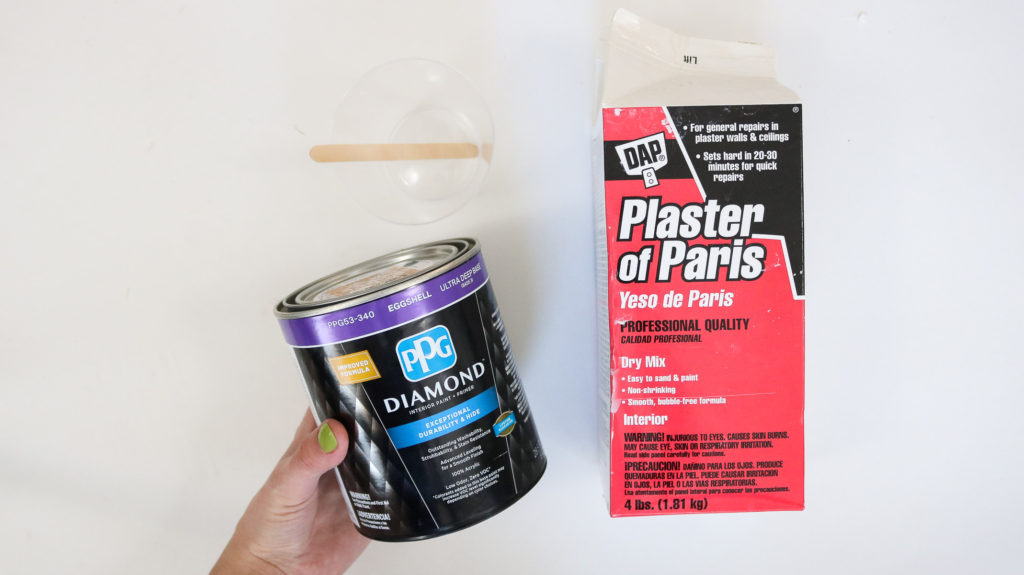
What you’ll need:
- plaster of paris
- disposable mixing container plus stick
- 8 oz paint ( I used PPG Nightwatch)
- 2 table spoons of COLD water
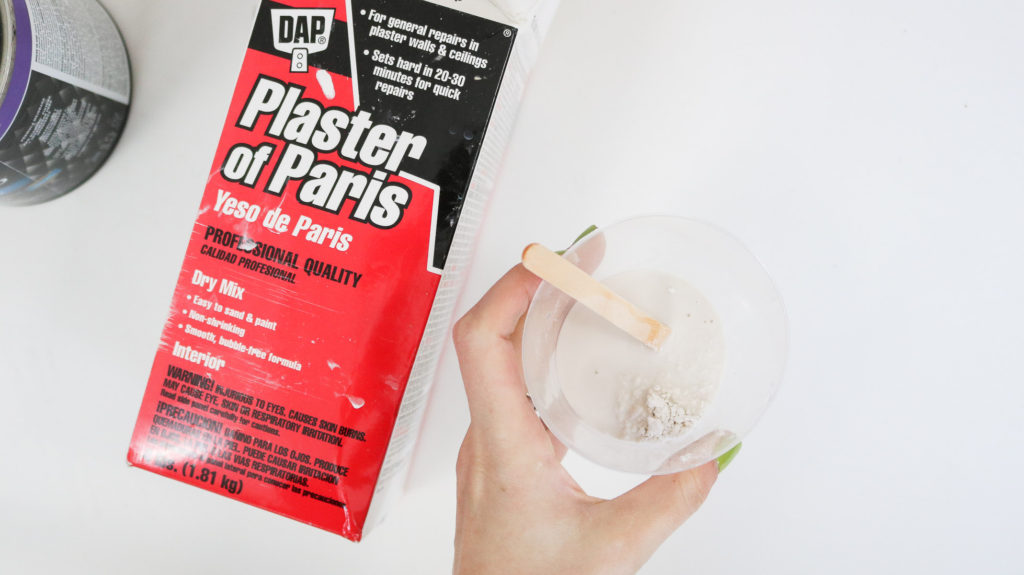
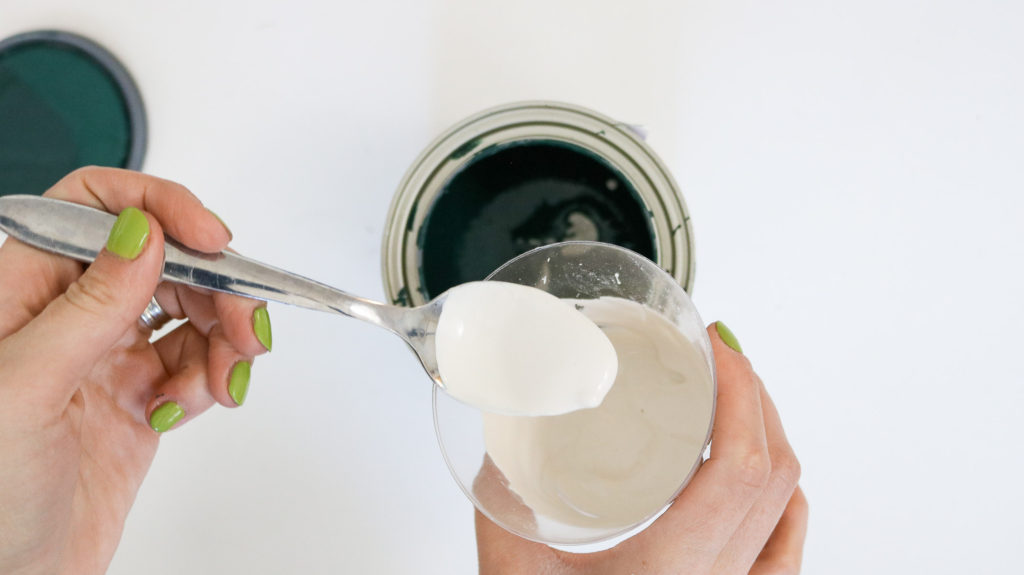
To make your chalk paint you’ll need 2 tablespoons of cold water in a disposable cup. Add your plaster of paris and stir until it’s smooth. It should be similar to pancake batter ( not too thick). Once you have a smooth mixture add 2 tablespoons of this mixture to 8 oz of paint and stir until combined! That’s it! Pretty easy right?!
Make sure you wipe down everything right away if you plan on reusing it. Once it dries you will not be able to remove it!
QUICK PAINT REVIEW!!
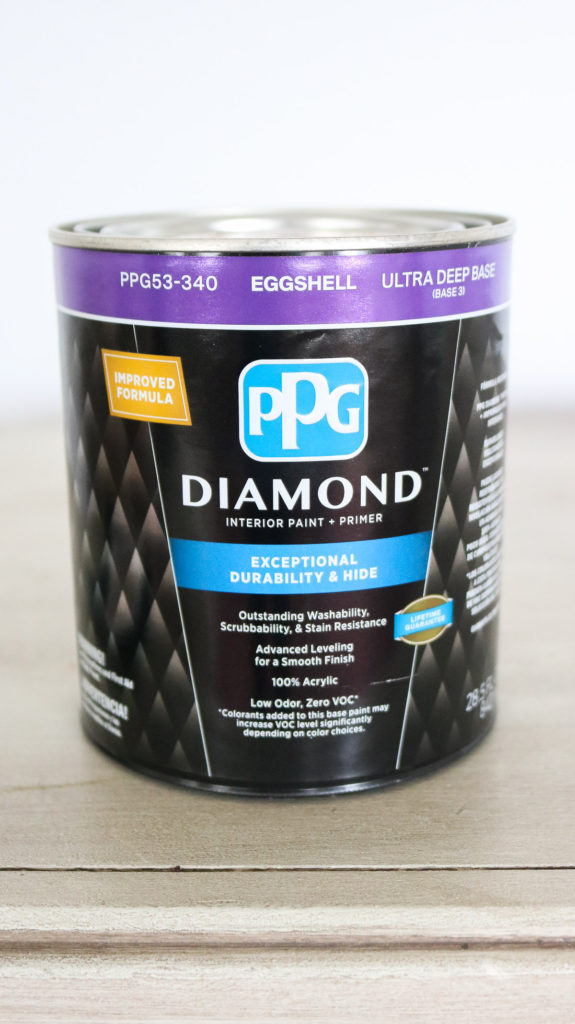
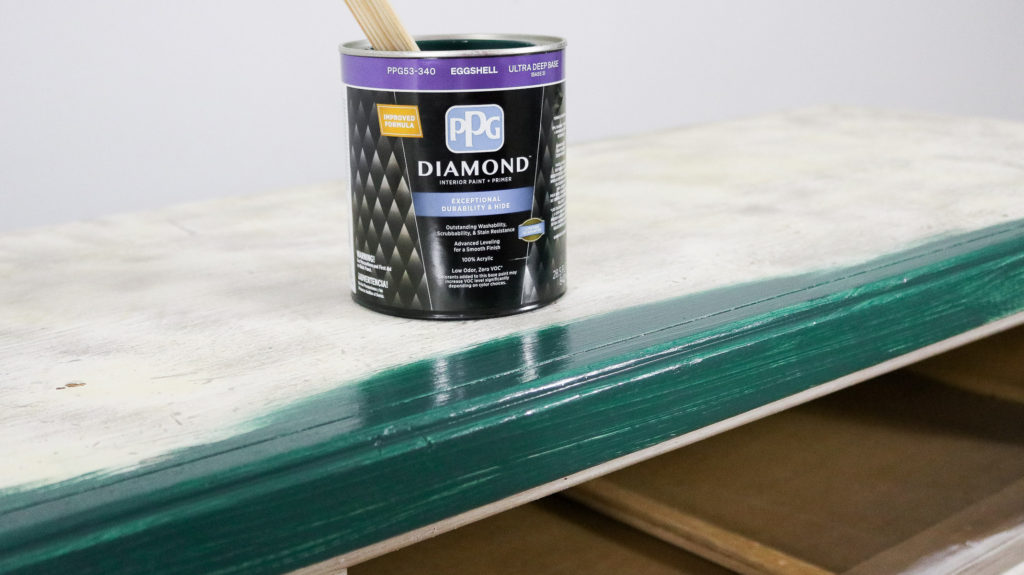
I decided to give this Diamond PPG paint a try this time. Until this point Olympic sold at lowe’s used to be my favorite. Unfortunately they don’t sell at lowes anymore. The reason I decided to try this paint is because, I used the timeless ppg paint (it’s a little more expensive than diamond ppg) and loved it however I can’t say the same about this paint! The coverage wasn’t great and durability feels iffy. I’m not going to say it’s absolutely horrendous but, I wouldn’t use it again on furniture maybe on a wall. The timeless ppg is amazing and has great coverage whoever they don’t sell it in the smaller sizes. It only comes in 1 gallons.
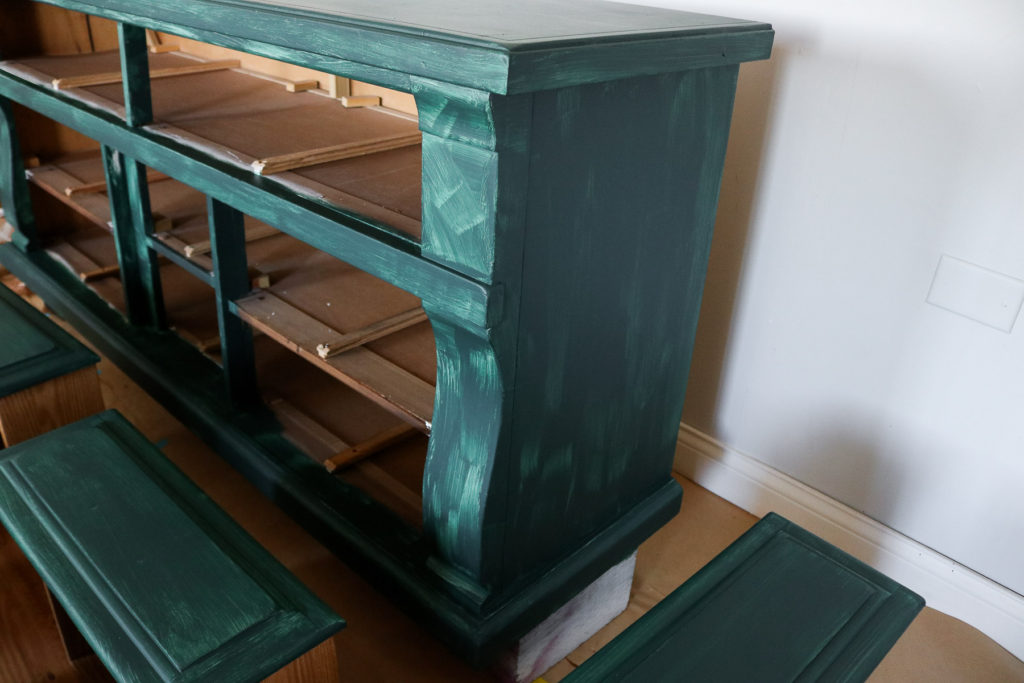
Here’s what the first coat looks like. Not the best coverage and looks pretty blotchy. It took me at total of three coats to get an even finish.
DON’T BE FOOLED BY THESE CLEAR FINISHES!
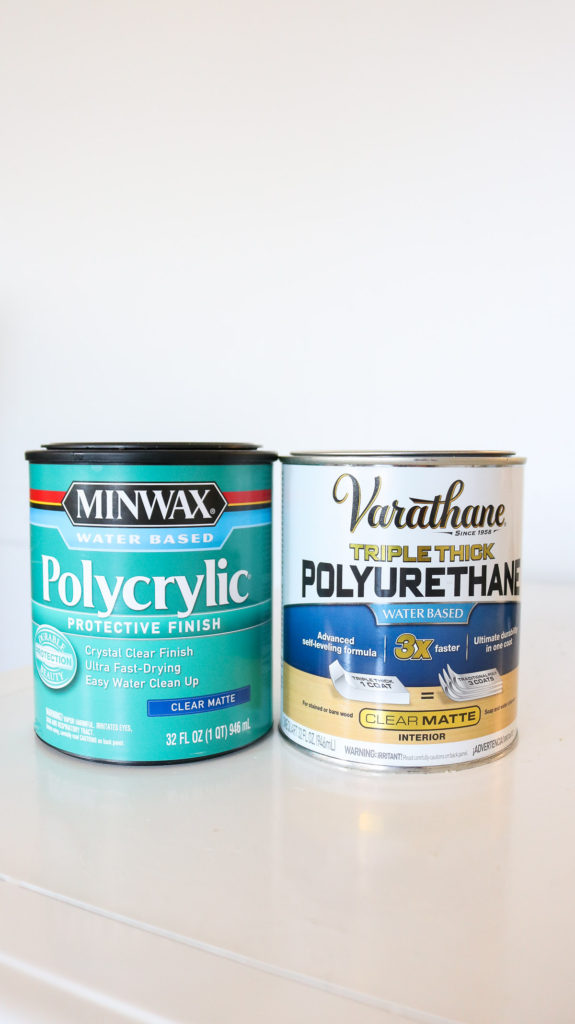
So I was really wanting a nice matte finish for this dresser. Since this color green is pretty bold I feel like adding shine to it would be over doing it. I actually bought two matte finishes to try. One from lowes and one from home depot.
- The varathane from homedepot was way to thick which was a pain to apply. You couldn’t apply it thin and when you did finally apply it it got nasty runs on bigger surface. It took about 5 minutes for the runs to show up and I totally freaked out ! I had to wipe the whole area off with a wet towel. I also noticed it dried all blotchy on the dresser doors. A total flop!
- The minwax was more of a runny consistency and I thought would be the winner however don’t be fooled this is not a matte finish at all. In fact I think it’s shiner than a satin finish. Not the look I was going for.
I ended up repainting my dresser once again after all this.
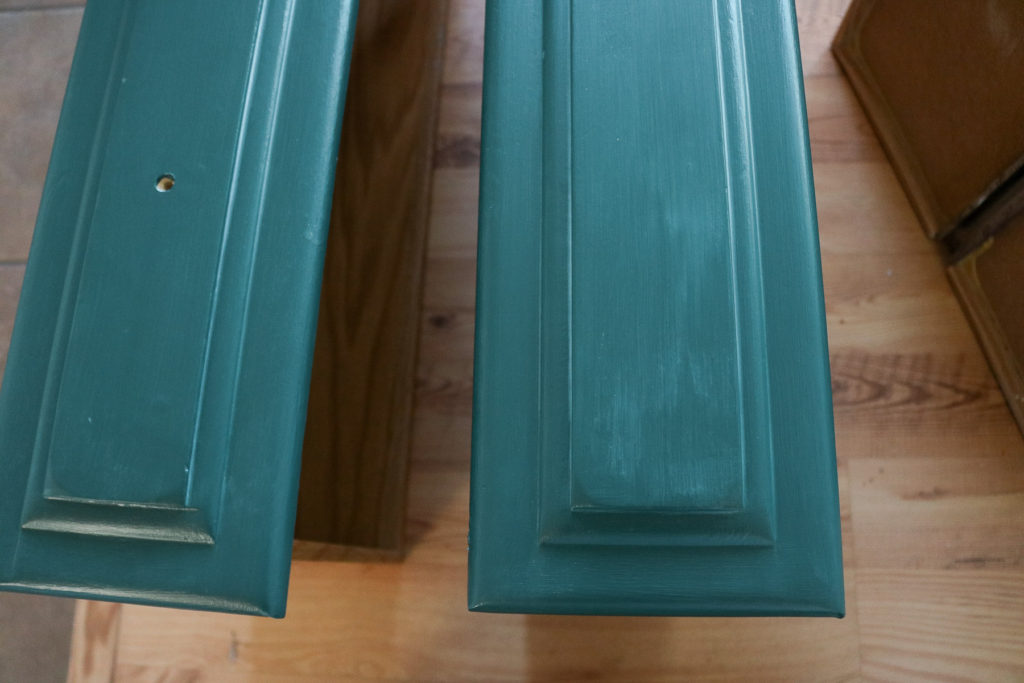
Here’s a quick look at the varathane matte that’s already dry. Do you see the blotchy white areas?
Here’s a quick view of the minwax matte finish. LOL if you’re wondering why I painted the whole dresser to find out this matte clear sucks! It’s because, I was hoping the clear coat would turn matte over a few hours and didn’t really have time to do a test trial on a smaller piece. HUGE mistake I so should of tested it on a small spot.
WAX FINISH UPDATE COMING SOON!!
As of now I have the dresser just with the chalk paint and no matte finish. I do plan on waxing it. It’s something I’ve tried before and love how it looks. I’ll post an update soon. It’s been a busy week I just haven’t gotten around to doing it I was just super excited to share the complete look with you! 😀
NEW DRESSER HARDWARE!
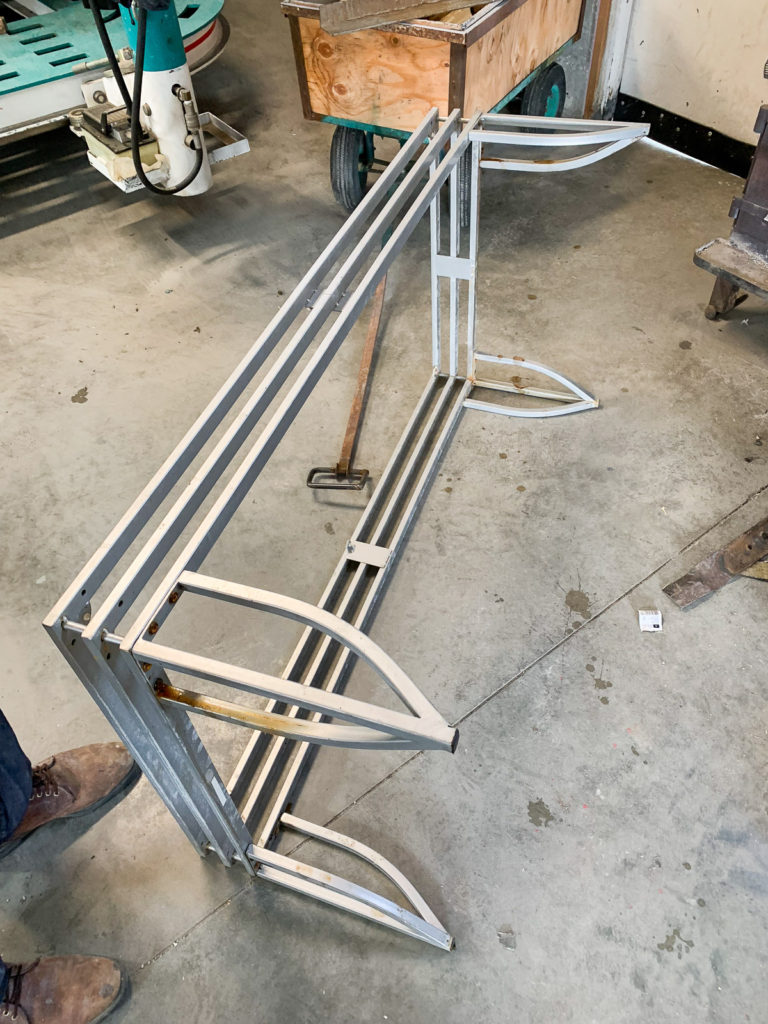
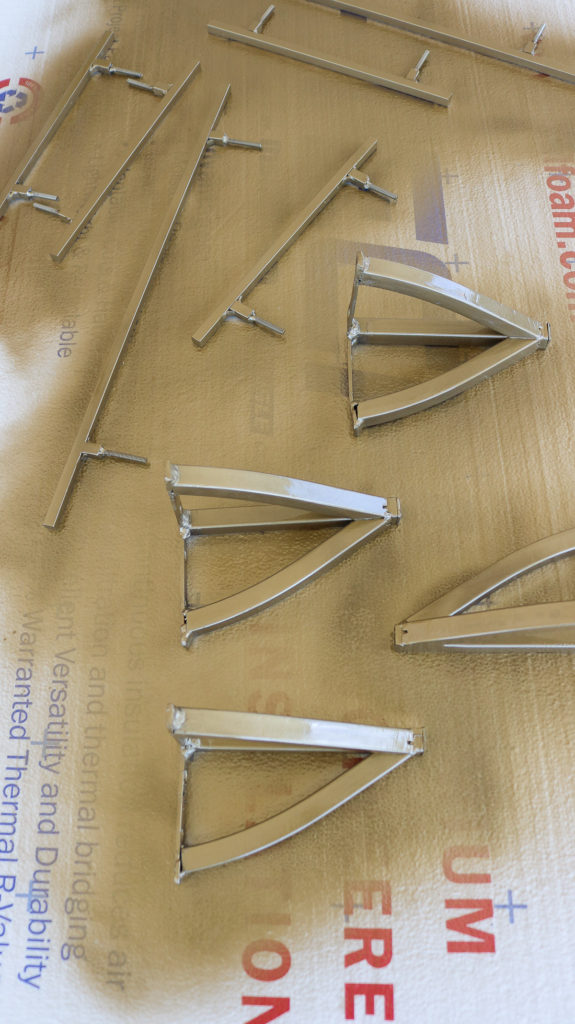
We decided to make handles and legs for the dresser. The legs we ended up making from an old coffee table that my mother-in-law gave us a while back and the handles were made from a solid bar I got at home depot. ( You can watch the full process on the video.., sorry I didn’t take much photos) This project was quite a handful. ( coffee table before we removed the legs – photo below)
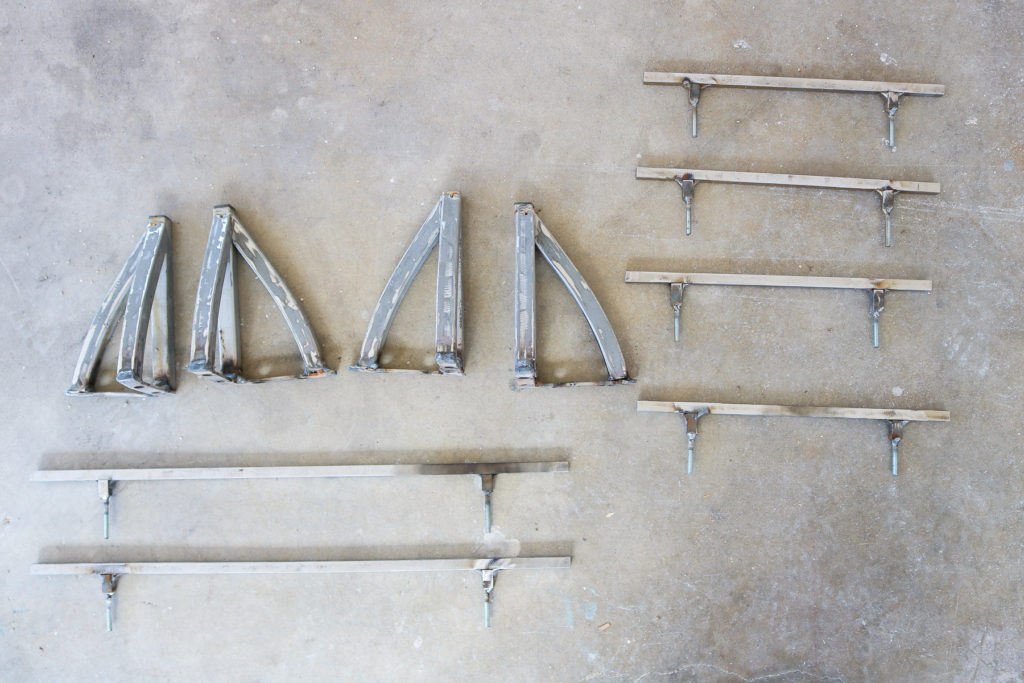
Here’s the full set of legs and handles complete. ( photo below)
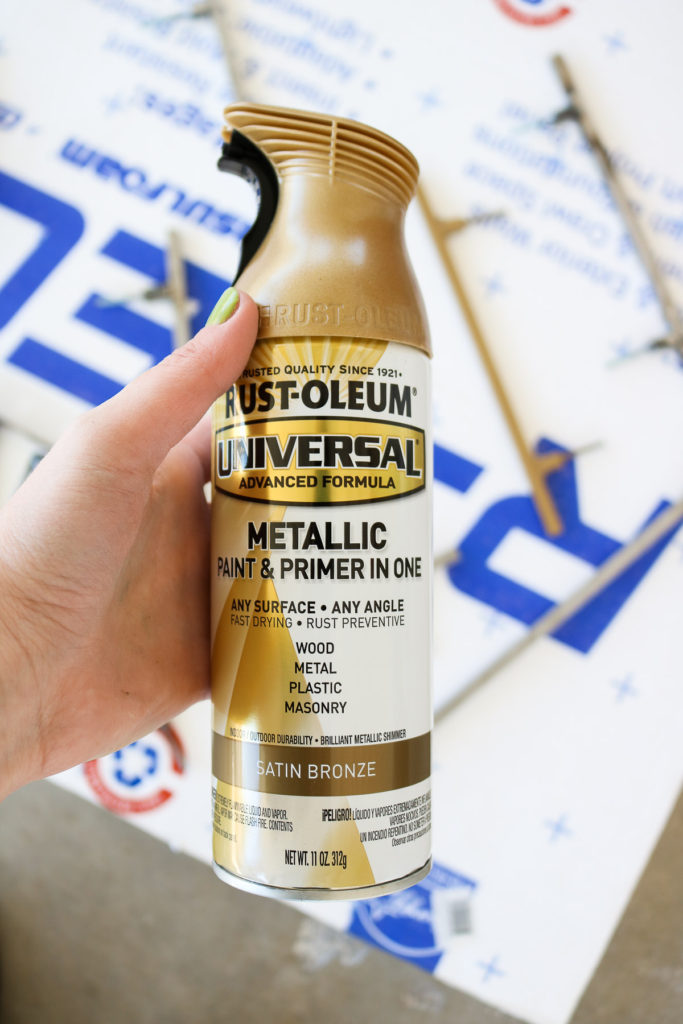
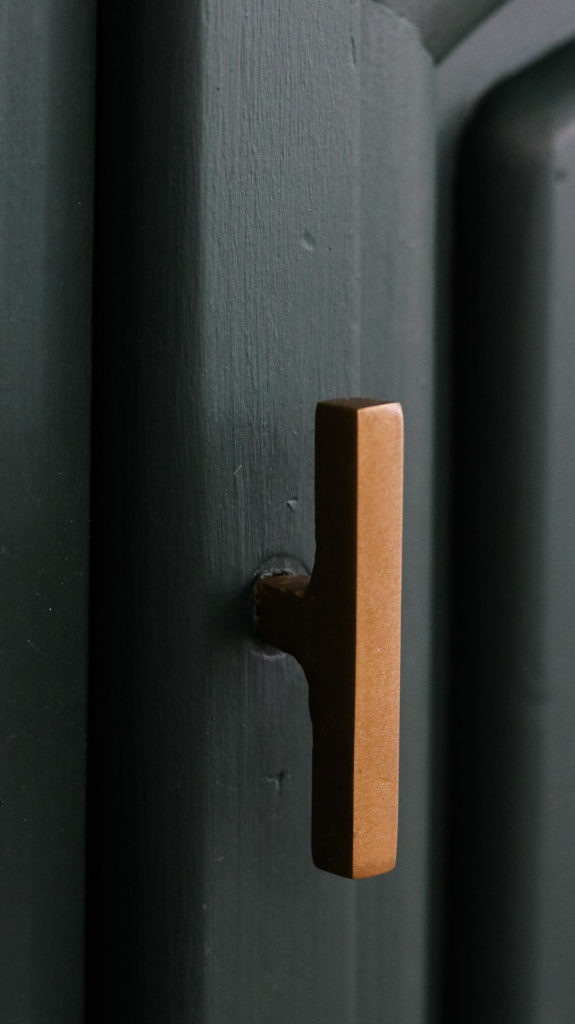
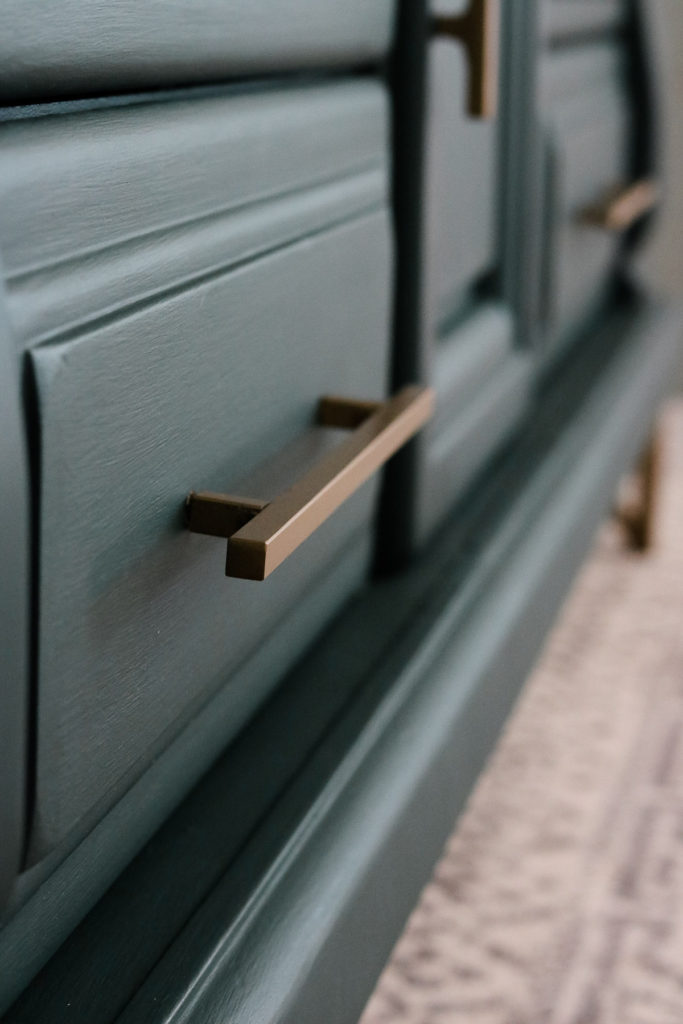
I used this satin bronze spray paint to get a nice modern look on them. I love rustoleum products!
Here’s a quick video of our dresser makeover process!
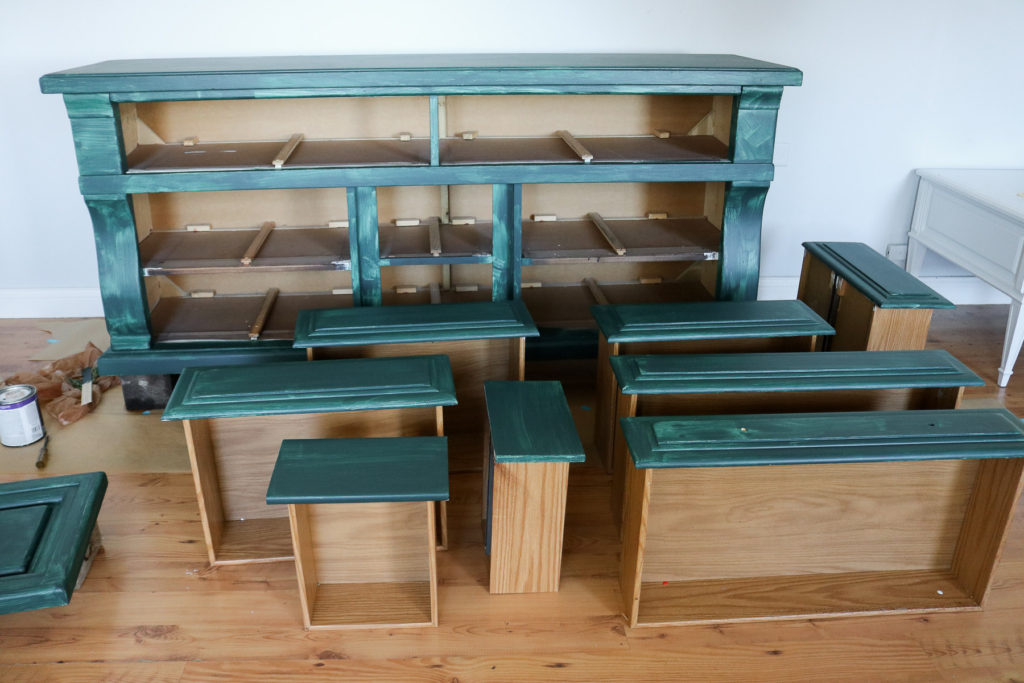
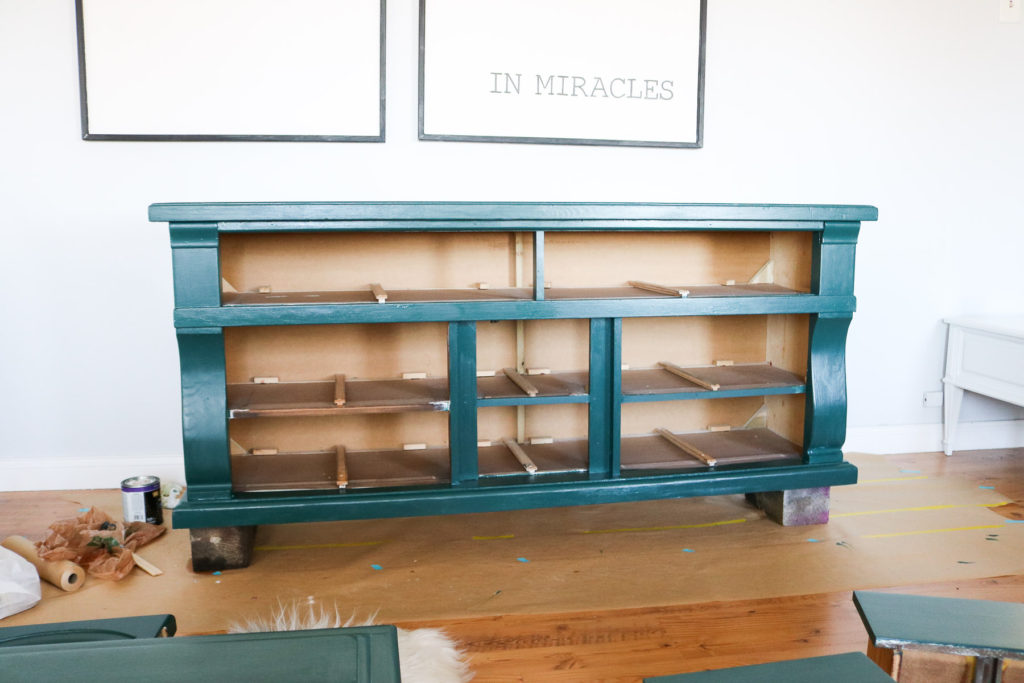
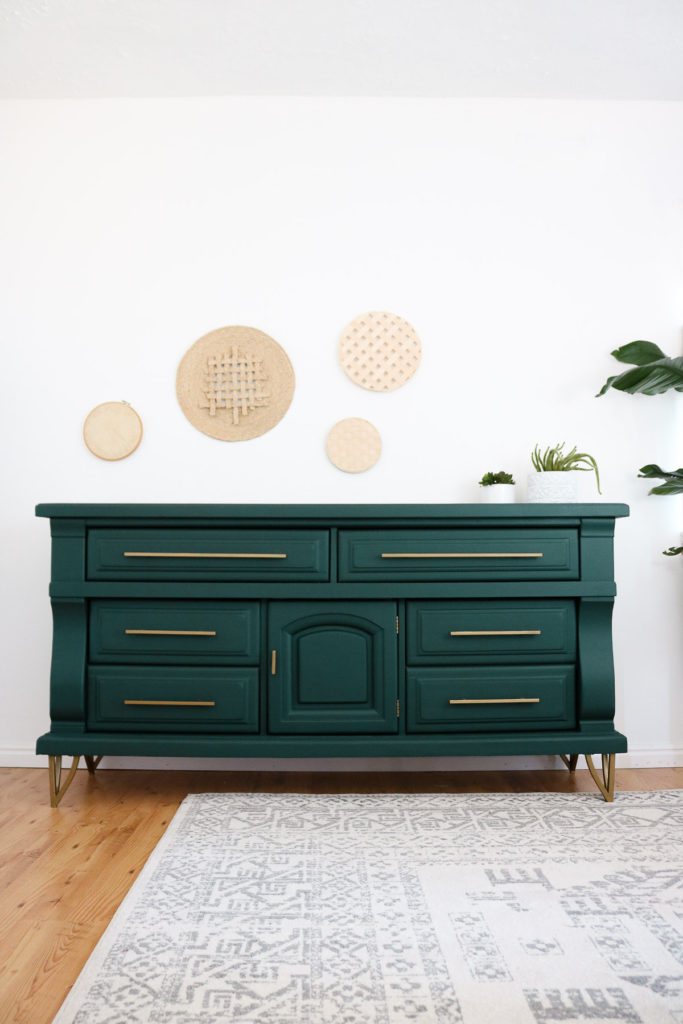
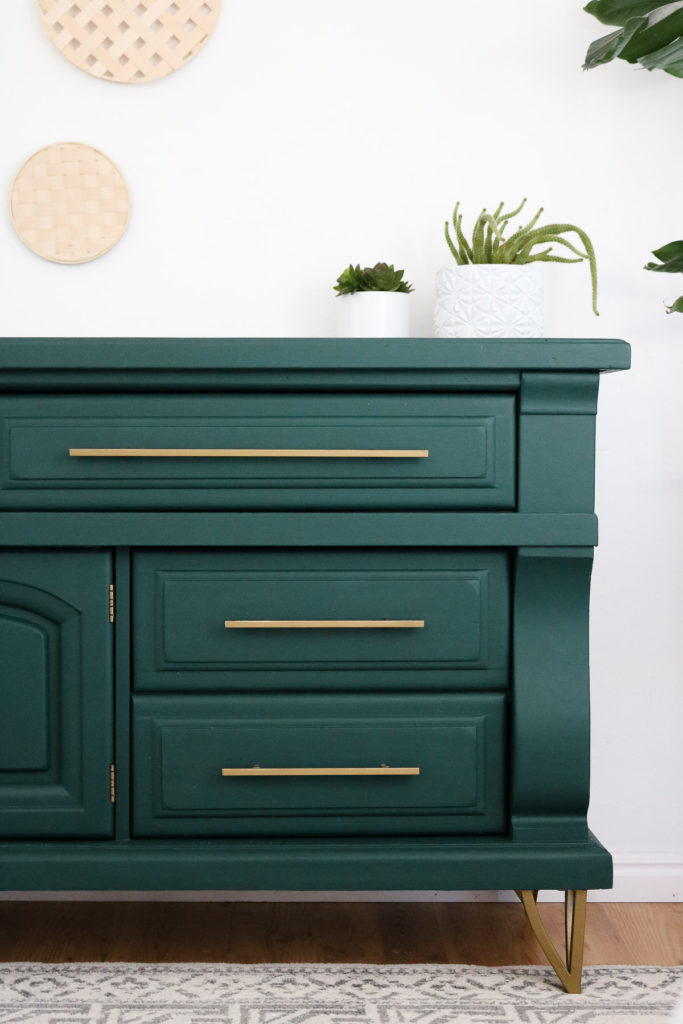
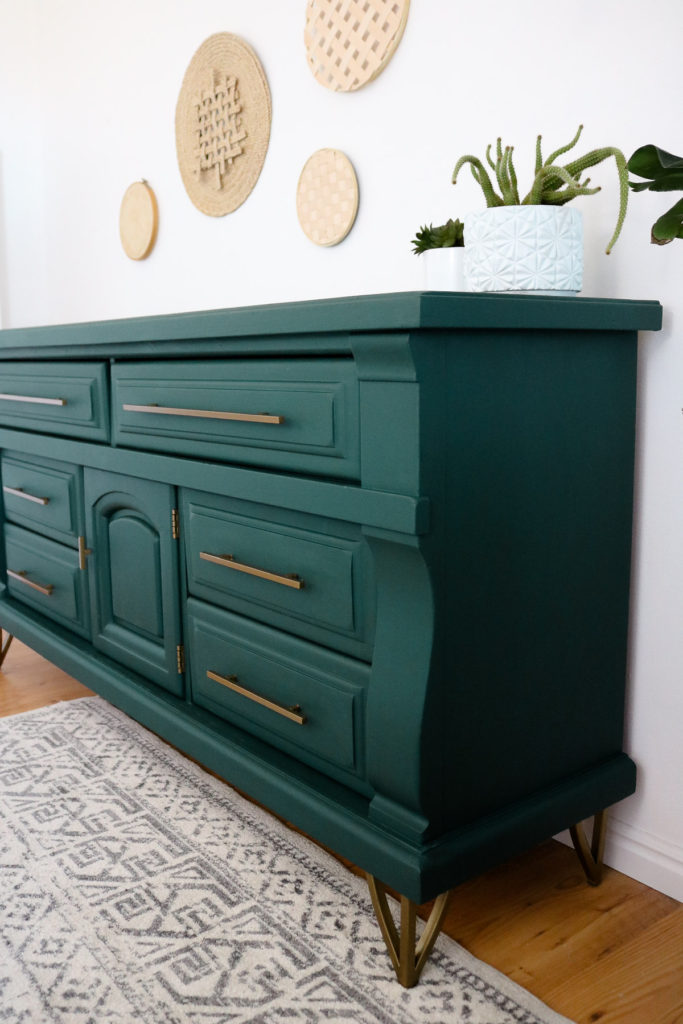
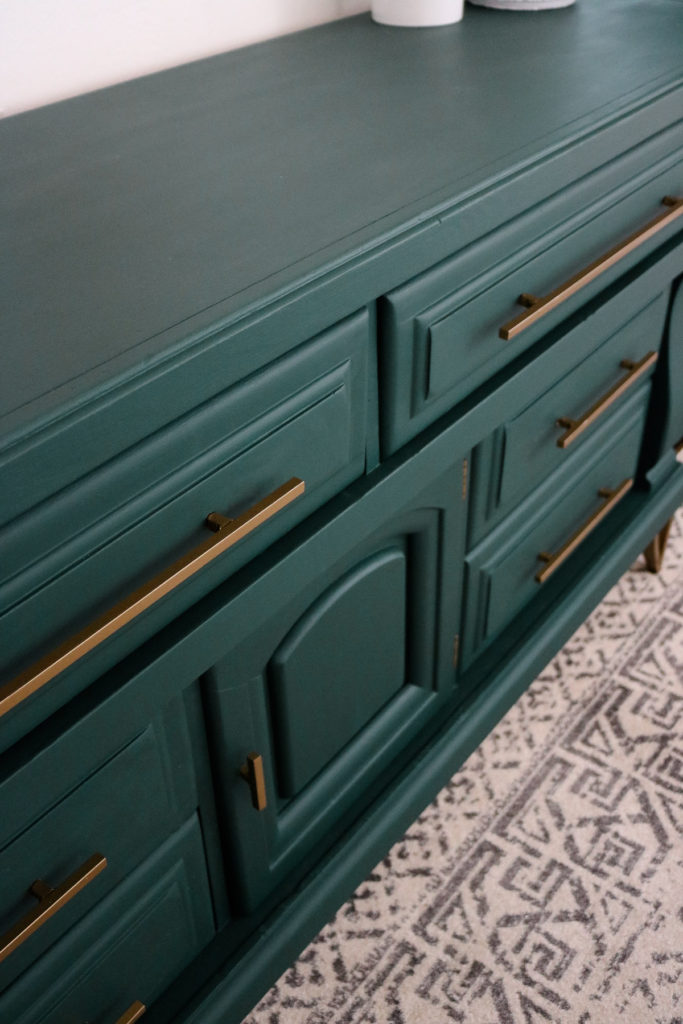
Here’s the dresser complete! I’m hoping I don’t get sick of this color. LOL😂 I know I usually get sick of colorful things quick but, I noticed I love green at least 90% of the year. What do you think of the color?
I’m so in love with this hardware! The ones I was looking at were $35 each. I’m so glad were figured out a way to get them done for cheaper. These only cost us about $5 each. Isn’t that a great deal?
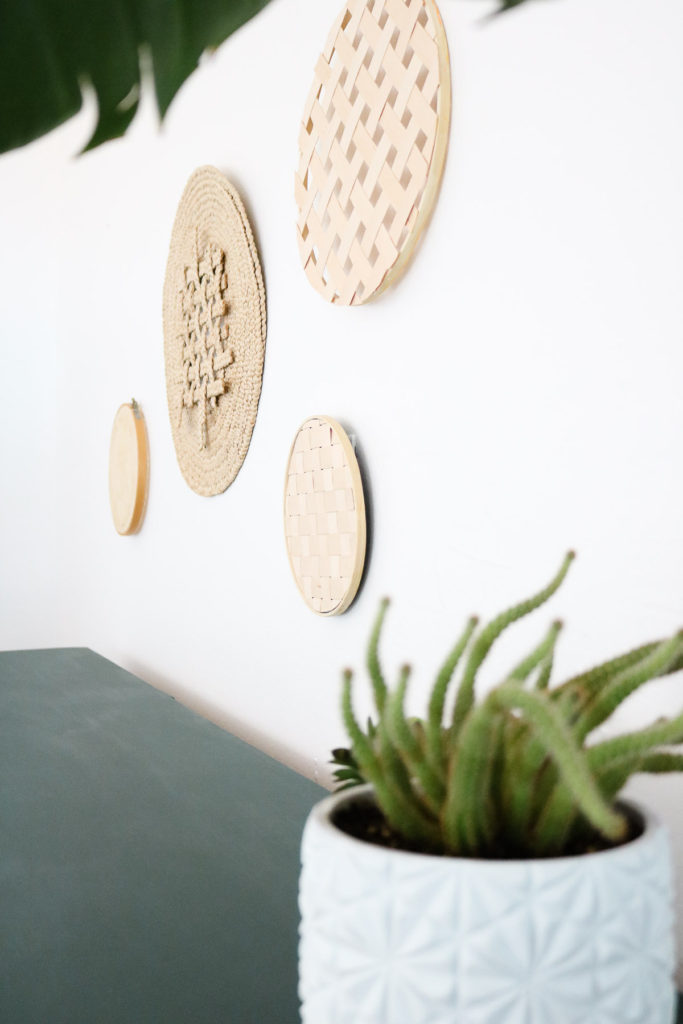
I also made these cute wall baskets for super cheap. I’ll be sharing how I made those soon.
That’s it for today! I hope this was inspiring! Thank you for stopping by! I’ll see you next time!
Xo,
Lily-

OMG the fact that you and your husband MADE those handles is INCREDIBLE. I am shocked and delighted – they are amazing. What an impressive upcycling project from the old coffee table they were on. Also – I really really love the dark green color you chose. The whole project is really inspiring me – as always Lily <3 Thank you!
AWWWE thanks Melissa!! You’re too sweet! I’m so happy to hear you loved the new hardware and I’m glad I could get Tony to do it! I feel bad distracting him from work sometimes but, if I get him excited about a project enough I usually don’t even have to ask LOL ! 😀 😀 I’m so happy this was inspiring! Thanks girl!
What was that color?
nightwatch made by ppg
Where do you get this ppg???
Homedepot sells the ppg
Can you share what the name of the paint color is that you used? I would like to redo a dresser for my nursery and want the exact color! Thank you in advance 🙂
Sure it’s Called Nightwatch by PPG 🙂
I turned it into chalk paint so it was matte. I didn’t add wax it’s still holding up great. So happy to hear you loved it. Thank you
What do you do to the furniture to wax it? Is it a paint type consistency or more like the square wax you’d use in a surfboard?
It’s like a buttery paste. You rub it on not super thick just decent layer and let it sit for about 10 minutes or so before rubbing it off with a clean paper towel to create a slight shine. linking one I used before and liked a lot https://amzn.to/3dk0VXD
Beautiful color! Did you really only use 8 oz (1 cup) of paint to do multiple coats on this large piece?
Thank you. I mixed only 8oz of paint at a time to make the chalk paint. sorry for the confusion. I’m pretty sure I used a bit more from what I remember.
Would you share the color green you choose? It’s beautiful!
Nightwatch by ppg ( sold in homedepot)
That’s hysterical. I agonized over what color to paint my son’s bedroom and wanted this exact green. As I was looking at your photos, I kept wishing I’d used whatever color you used. Guess what color I used? 🤣 Nightwatch by PPG!
OMG what a coincidence! LOL! It looks more turquoise in cold light and warmer green in warm light.
OOOH that’s awesome! I love love love green! If my hubby allowed it I would totally paint a whole wall that color 😀 😀 Sounds so pretty!
What wax do you recommend for this??
I use the Johnson furniture wax sold at homedepot. It’s a yellow container. Minwax also sells a good one. I’ve also heard about about the anne sloan wax .
Hello! So the final pictures of the dresser have chalk paint only?? The dresser looks very matte. I says you plan on waxing it, have you done it yet? I’m curious to see the pictures
Yes it’s just the matte paint. I didn’t wax it because it’s been holding up so well.
We made the hardware. You can see in the photos. Some from the coffee table we upcycled some we made from metal rods.
So you use 2 tablespoons of the plaster to 8oz of paint. So does that mean I would add 7oz to a 28 oz can of paint or do u make 8oz batches at a time?
I usually do 8oz at a time. I’ve never made a batch that big but, I’m sure it should work. I would maybe do a little less plaster if I’m doing a big batch.
Hello and great work!! Can i ask the color green? I dont see that mentioned or where did u end up getting the handles? Thank you!
Thank you, sure 😀 it’s called Nightwatch by PPG
Where did you get the handles from?
We made them. I show the whole process in the video. 🙂
Got to be one of the best redos I have seen. Hard to decide if I love the green or the new hardware the most. If you get tired of it I will be glad to give it a home.
LOL!! AWWWE thank you so much Betty! I’m still very much in love with it. 😀 😀 😀
I love the finished product and am especially smitten with the hardware. I watched how you made the handles. But still have questions. Did you also cut the small pieces that attach the bars to the dresser from the original long bar? How did you attach the threaded part to those short pieces of bar? What are the tools needed? You said a grinder. And I guess you need a torch and whatever substance is used to attach the 2 metal pieces. Do you also need a metal saw or a dremel?
Thank you so much Susan! Yes we did cut the smaller pieces from the small bar. He gently welded the threaded pieces on. Oh he used a welder to attach the metal all together. I’m not sure you can do this with a torch in a soldering manner. I don’t know if solder would hold as good as a weld. Yes he used the grinder to cut all the pieces and a welder to attach it all together. Welders are pretty pricey but you can also get them made at a local welding shop. We get a lot of stuff welded at our local welding shop even though we own a welder. They usually know what they’re doing. They also usually have the basic metal in shop. I hope this helps! Let me know if you have anymore questions 😀
This is gorgeous!!! I love the legs! Have you ever seen a place that I could buy legs like that?
Hi Lisa, thank you. No I haven’t. I wish there was a store that made those! 😀
Unbelievable! Love this. I’ll keep this in mind to attack the beast that has been intimidating me in our other garage. It’s a mint condition quite beautiful antique secretary/hutch I snagged for $90 and it has the skeleton key!
Thank you Julia! Oh sounds like a fun project! Good luck. Let me know how it goes!
How did you paint the hinges gold?
Just sanded them down lightly. Wiped the dust clean with windex or rubbing alcohol and gave them a few light coats of paint.
What wax do you usually use? Did you wax this after?
I have left mine with no wax and it does get marks easier.
I didn’t wax it. it’s still matte and holding up well but I don’t use it heavily. Never leave plates or cups on it 🙂 . I usually use Johnsons furniture wax sold at home depot.
I love this color!!
Do you remember what the color was called?
So glad you love it! It’s called nightwatch from ppg. Sold at home depot!
Lily,
I have so enjoyed watching your videos (you are so very endearing in how you encourage and present) and it inspires me to create using what I have in my home and using colors and textures that comfort me. Your instructions are straight forward but also allow for me to come up with my own spin. Thanks for the wonderful example.
AWWWE thank you so much Cynthia!! This is so sweet! I’m so happy you liked this dresser transformation and that my work inspires you! 😀 😀 😀
Hey Lily!
I am OBSESSED with the color and have read and watched you repaint this dresser soooo many times lol! 😂
Now did you first sand the dresser down, make your chalk paint, mix it in with PPG Nightwatch, and then painted the dresser?
It took three coats but is this what gave it that shiny look or was it the applying of the “clear matte”?
Should I avoid putting anything else other than the chalk and interior paint mix on the dresser?
I wanna try a similar project because I am absolutely inspired!
Thank you so much for your creative work! I look forward to your projects!
Hi Sam, LOL that’s too funny! I’m glad to hear you loved it. I don’t remember for sure but, if you’re using chalk paint you shouldn’t have to sand it. You can go over it very lightly with some sandpaper by hand just in case. The shiny look was from the clear matte finish. The paint on it’s own is actually matte. It’s still holding up really well matte ( just paint) even without the wax finish I planned on adding.
As far as using just this recipe there are lots of paints to pick from on the market. It really depends on what you’re painting? Is it super glossy?
My dresser wasn’t super glossy so I wasn’t worried about sanding it at all. If I was to paint something glossy I would probably lightly sand it and use a special primer (maybe the gripper primer made by ppg) than go on to painting it with some chalk paint or regular paint. Just to be on the safe side.
Awwe your very welcome Sam. So happy to hear you’re looking forward to more DIYS 😀 😀 😀
Love it! What did you use to get the matte look instead since you did not use the minwax clear matte finish?
I left the dresser without a finish just the matte paint. It held up really well so far only one tiny small scratch on the edge.
Just wondering what finish you ended up going with?
Hi Britt, my dresses is still matte. It’s actually holding up really well I’m thinking I might just leave it like this. 🙂
I am so glad you mentioned the wall hangings. Those are so cute! I’m excited to see how you made them. Looking forward to it! 😀
YAY! I’m so glad you like them! I just posted one yesterday! 😀 😀
This is an EPIC furniture makeover! I love it so much.
Thank you Tanya! 😀 I’m so glad to hear you love it! 😀
I don’t believe there was. I think it should be okay. Wax wears off over time.
Whats the name of this COLOR?! 😍
PPG Night watch 😀
I’m not very adventurous but I really am looking for this look and it’s either impossible to find, or way too expensive.I’m going to attempt it on something small first then I’ll look for a yard sale piece that I can transform into a work of art like this. Wow, Wow, Wow! This us Gorgeous!
I know what you mean. I was on the lookout for something like for a while. You go girl! Let me know how it goes! So glad you loved it! Thank you
How long did you let the caping dry in between coats??
I love this especially the color! Way back in the 70’s (I’m dating myself) I had a console television in that gorgeous dark green. I never tired of it. Did you give the color name and I just missed it?
Thank you Linda! Wow your console sound beautiful! I’m not sick of mine yet so hurray for that! I love how people dressed in the 70’s such a fun time! Oh shoot I think I forget to mention it. It’s called Nightwatch by ppg. 😀
I just found your blog, and LOVE this dresser makeover!
FYI… If you add a teaspoon of paint(base color) to your clearcoat (water based) then you won’t get those blotchy whitish streaks.
Just tryin to share the love…
Hi Melanie, thank you so much! I’m so happy to hear this! OH wow I’ve never heard of that! I’ll have to try it. 😀 Thank you so much for the tip! I appreciate it!
Hi, have you had any problems with wood turning musty in the dresser after painting?
hi 🙂 no I haven’t had that issue. Maybe try letting the paint dry with the dresser taken apart for a few weeks?
Hey there, quick question… how long did you let the chalk paint dry in between coats?
A few hours until it felt dry to touch 😀
Hi, love the handles especially the fact that you made them yourselves. Have you ever tried making chalk paint with calcium carbonate? How did that go? Thanks so much and continue your great work!
Hi, thank you! I’m so glad you loved the handles! I actually haven’t tried it before, will have to try it some day.
Can you let me know what brand and color this green is? I’m OBSESSED!
The brand was ppg glidden in the color nightwatch 🙂 Glad you loved it!
Love the color!
What is the paint color?
Nightwatch PPG 🙂
LOVE, LOVE, LOVE your color choice! Your vision was carried out so well! I really do marvel you using the coffee table legs! I have a whole suite of furniture much like your dresser that I really want to redo. I’d love a green like you used but would you do all the pieces in the same color or what would you recommend? So it’s the dresser w/mirror, two bedside tables, a headboard as far as the bedroom. Then a coffee table, end table, two corner shelves, too book shelves and a hutch in the living room. The bedroom pieces are currently a cream wash and brown. The living room furniture are light yellow oak wood stain.
Hi Rosanna, Thank you ssso much! You’re too kind! If you’re doing more than one piece this color green might be too much. I feel like it’s more of an accent color. Maybe stick to a simple white or pale gray? Also really depends on what you’re surroundings are. Walls and floors. Maybe you can get some wood pieces to have a natural wood look and paint the rest white. ( theres stuff sold in stores to remove old stain or paint) Depending on what style the furniture is this can give you a mid century modern look or even a Scandinavian look. I love to surf pinterest for furniture inspo! Compare colors of furniture with flooring and walls. It helps me envision better and is always my go to! Hope this was helpful! let me know how it goes! 😀
Looks amazing but I’m a bit confused. What paint did you use that worked?? Thanx!
Oh wow I just read the post it is pretty confusing I should revise it. I used Diamond PPG for the dresser. They sell Diamond PPG and Timeless PPG at homedepot. Timeless PPG is only sold in gallon sizes so I decided to used Diamond PPG since they sold it in smaller sizes and I didn’t need a lot for the dresser. The Diamond PPG didn’t have great coverage unfortunately. I would say Timeless PPG had the best coverage in my opinion. Let me know if this makes sense. Sorry about the confusion.
I am in awe. Simply beautiful transformation and you make it sound so easy. Inspired to give a smaller scale project a try.
YAY! I’m so happy to hear this Candy! You should totally give it a go!
The breath-taking green caught my attention on Penterest.I have a miss-matched china cabinet and thought maybe this color would pull them together. I understand all of your hard work,I’m the same when I re-do something. I looked for where you bought this amazing color, but guess I missed it. Thank you for sharing, hope to see more of your work in the future. By the way;I hear Bondo,the kind used on cars works well to repair furniture.
Thank you so much Pamela! I’m so happy to hear you loved it! I got the paint from homedepot Brand PPG color Nightwatch. Good to know! I tried it before never payed attention to see if it worked well I’ll have to take a look at my piece of furniture.
Thank you 🙂
OMG this is the bottom half of my bedroom hutch. I was thinking of painting it white and now I don’t think so. Glad I saw this. I do love your makeover but don’t think I want a green bedroom set. You did an amazing makeover but you have me totally confused now. Lol great inspiration!
Thank you Sue! I had to pick between white and green too! 🙂 It’s a tough choice. I’m thinking to eventually paint it white LOL!
You are an inspiration! This makeover is superb and totally representative of polished craftsmanship that enables an older piece of quality furniture to shine again in the esthetic of the 2020’s! It is so much better than new. Well Done!
Thank you so much Pamela!! I’m so happy to hear you loved it!
Omg!!! This is gorgeous. I will definitely try on a much smaller scale though. Lol. What still matte brand finish did you end up using?
Thank you 🙂 I never clear coated it yet. Ended up leaving it with just the paint and I LOVE IT! Still holding up really well.
How much of the plaster of Paris do you mix to create the chalk paint?
2 tablespoons of cold water and add the plaster of paris until it’s thick like gravy 🙂 Than pour the mixture into paint and stir to combine.
So just to be clear…you only used the nightwatch paint, about 4 coats and then did you do a clear coat at all?
Yes 🙂 It’s actually holding up really well. I never leave cups or food on it ( as to not get watermarks) 🙂
I hope you do t get sick of the color too quickly because it looks beautiful! Love the legs, handles and the makeover! Great job!
Thank you Shirley! Haven’t gotten sick of it yet 😀 😀 So glad you loved it!
I use the Varathane matte finish and love it. I found it’s best to use in a cooler setting…there is not much work time. And I use a very firm brush and don’t overwork it. Also, it seems like if you put it over a shiny paint it doesn’t stay matte. It’s best over a flat paint. Lots of good info in this post. Thanks
Thank you 🙂 OOH that’s a good point. Didn’t realize temperature could make such a big difference. Can’t wait to try it again with this tips. Thank you so much for sharing Margaret! 😀
It really needs legs in the middle for stability and so it wont bow!
Gorgeous ! STUNNING ! Amazing !
Thank you so much Daisy 😀
The hardware pulled the matching legs into view. I was not too fond of the legs until I saw the use of the matching hardware. Great idea. You could always add a glass top that glass company can cut to fit. I cover most of my accent tables with glass tops and I dont have to worry about company setting glasses on wood, even when I provide protection holders. Some of the tops I put lacy doilies or table runners under the glass.
Thank you Becky 😀 Agree I don’t think the legs would of worked without that hardware! I love the idea of adding a glass top! 🙂 It will definitely help it last longer.
Speaking of legs, do you know the measurements of the legs?
Legs are 6.5″ in height.
Gorgeous makeover. This is genius recycling. I like that you put so many pictures and details in the explanation. Bravo and thanks for the inspiration.
Thank you Johanne!! Makes my day to hear feedback like this and I’m happy to hear this is inspiring! Happy DIYing 😀
Definitely one of the best re-do’s I’ve seen. So creative, and love the color choice and hardware that you made. Truly one of a kind!
thank you Katy 🙂
It’s wise to sample as you proceed. Your topcoat got cloudy because a matte finish over a deep color will do that. Using a gloss topcoat first, followed by a matte coat will result in a clear matte finish . You might want to use a microfiber or mohair roller to get an even nap on the surfaces, maybe a wet sand with ultra fine paper as well. Brush marks aren’t a good look. The updated design is excellent, craftsmanship could be improved.
Your enthusiasm is wonderful, your grammar, not so much. Have someone edit your blog. Poor writing distracts from your interesting work. It’s a blog. Words matter.
Beautiful…..I am fairly new at this and am getting ready to do a antique vanity desk I believe is what they call them, it has the square mirror instead of round….I have it all sanded and ready to paint but I have 1 drawer dragging on the other….my husband has tried everything to the point of having to walk away…..I am going to work on bench today as it needs recovered as well as painted…. any suggestions on the drawer dragging. When closed the fit is perfect?????
Hi Sue, thank you. Happy to hear you liked it. OH WOW I’m sorry to hear that. Gosh I didn’t know about that much myself. Wish I could be of more help.
Just to clarify, did you make this Nightwatch paint into a chalk paint?
Yes exactly what I did 😀 😀
I have seen thousands of furniture makeovers, this might be the best one I’ve ever seen! I am so impressed with both the redesign and the new color and the hardware that you made by repurposing the old metal table!
Thank you so much Sue! I’m happy to hear you loved it!
Hi, I was inspired by your project and decided to go ahead and try it. Could you tell me what’s the height of the legs. I have to order something similar and I’m debating on which one to order as far as how long they are. Thanks
The legs are 6.5″ inches tall. 🙂
My girlfriend’s b-day is coming up and I received a monster full-sized Ethan Allen dresser for free during the course of my work. I’m impressed with the outcome of your piece and wanted to incorporate some elements of it onto a redo of my dresser. My only concern is, though I managed to track down the EXACT table you used for the metal legs, I’m unsure that the proportions will look right on my very large dresser. What are your thoughts, and how big was your dresser at the start?
That’s awesome. Sounds like a fun project. I lets measure 6.5″ inches in height. The body of the dress height is 29.5″ and the length of the dresser is 70″. hope this helps. 🙂
Wow this is beautiful! I’m in love! Did you end up using the wax at all at the end ??! If so which one I see two in the pic
I didn’t seal my dresser with anything. I left it matte and it’s actually held up really well. 🙂
Wow – such a great job. I just moved my husbands grandmothers ugly Henredon dresser into the garage and was getting ready to post it on facebook marketplace when i got a restoration hardware catalog and saw basically the same dresser for 2500! So i moved it into my entry hall instead and i love it! Go figure. It does need updating and i just love what you did with this dresser. And i do love the color.
Thank you so much Patty! So happy to hear you loved my dresser! Wow that’s crazy. Furniture is so expensive especially solid wood. I’m glad you kept it.
Love this! One of the best makeovers!
thank you Lucy 🙂
Hi There! Its been a while since you posted so I am hoping you still read these. I loved this upcycle video and it has been really helpful to my husband and I for refinishing furniture as we move into our new home. I read through the comments and it sounds like you ended up not doing the wax because the matte paint was holding up so well. Can you tell me what brand of wax you would have used had you decided to wax and maybe point me in the direction of a tutorial?
Hi Ruth, Thank you. I’m so happy to hear you liked this upcycle. Yes I left the dresser matte. I’ve only ever used Johnsons furniture wax that I purchased years ago at homedepot. It works pretty good however I’ve been wanting to get my hands on some of the Anne Sloan chalk paints and wax.
Which finish did you ultimately end up using on the dresser?
I left it matte. Just the paint alone it’s been holding up really well.
I love the entire project! The green is my favorite color I’ve loved it for years! The legs and handles are awesome! Great job!
Thank you so so much Terri 😀
Ahhh I mixed the paint like you said with plaster of Paris and I think it’s what’s causing all these white flecks that make it look super dusty in the paint I’m so disappointed. Having to buy more pain to hopefully do one final coat that doesn’t show the white specks.
I love your project but I don’t know that I would recommend the making your own chalk paint.
OH NO!! That’s horrible. I’ve been making my own chalk paint for years and have never had an issue. Did you add the powder straight to the paint and create a puddy with it before adding?
Thank you so much Kelly 🙂
I use one can that was 25 oz from what I can remember it’s been a while sorry.
I’m sorry if I missed it but can you explain why you made it into chalk paint instead of using a matte finish paint? Also how many coats of paint?
I’ve tried using DIY chalk paint before and really liked how it help up. I’ve never tried using matte finish paint before. You can try and see if you like it. From what I remember I think it was 3 coats of paint.
This may be the proper weblog for everyone who wishes to be familiar with this topic. You are aware of so much its nearly hard to argue to you (not that I really would want…HaHa). You certainly put a brand new spin with a topic thats been discussing for a long time. Wonderful stuff, just great!
Thanks for your post. One other thing is when you are disposing your property all on your own, one of the problems you need to be aware about upfront is just how to deal with house inspection accounts. As a FSBO supplier, the key about successfully shifting your property in addition to saving money in real estate agent commission rates is knowledge. The more you realize, the smoother your sales effort might be. One area in which this is particularly important is inspection reports.